Custom Search
Showing posts with label Embroidery Techniques. Show all posts

Wednesday, 14 May 2008

Wonderful and easy Bullion Knots Technique To Follow...

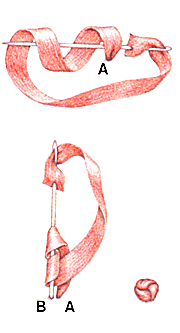
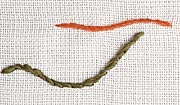
One of the most challenging for embroidery hand is to do a bullion knots. Maybe some of you will say it is easy and simple to do.Just wrap the thread, then you get the result. Are they produce very well and beautiful finised result? So, you have your answer..*wink*

I saw several videos on bullion knots lately since this technique is suitable if we want to put at our tudung (hijab) as accessories. For your information, to buy a tudung with beautiful embroidered in KL is very expensive. It will cost you RM100-200..Do you capable to buy?? For me, I dont think so..

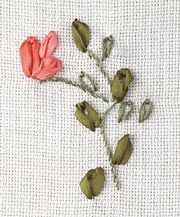
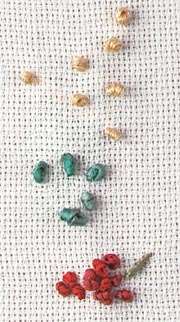
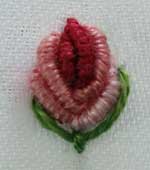
Today, I think i would like to share my favourite video of the bullion knots technique. I love all Mary Corbet's video tutorial actually. It is easy to follow and the techniques make the finished result so wonderful. So here, it is a bullion knots from Mary Corbet tutorial video. Hopefully, it will give you more inspiration and it will help you to have wonderful and beautiful roses ,daisies and other bullion finished result!

Enjoy....


Tips before you starting to do the bullion knots.


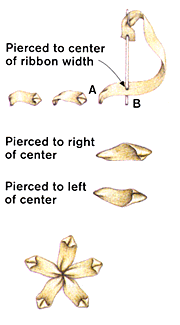
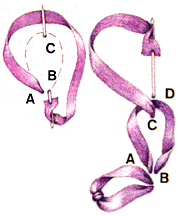
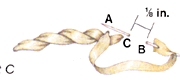
1. The needle you use is important. Yor work will be easy with a milliner (or straw) needle. The difference between milliner needles and other needles is that the entire shaft of the needle is the same diameter, so the eye doesn't bulge. This makes it easier to pull the needle through the wraps in the thread.

2. When you wrap your threads around the needle, you want them to follow the natural twist of the thread. So, for most stranded cottons and everyday threads, you're going to wrap your thread clockwise around the needle. The way to tell if you're going in the right direction is this: if, as you wrap your thread around the needle, the strands of thread start to untwist and separate, you're going in the wrong direction.

3. If you're having trouble getting the needle through th wraps, you can roll your thumb over the wraps lightly, back and forth, which will loosen them. Another trick is to roll your needle between your finger and thumb, back and forth in small movements, before you pull your thread through.

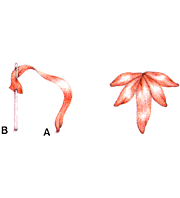
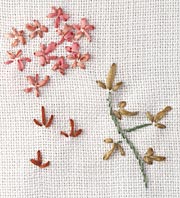
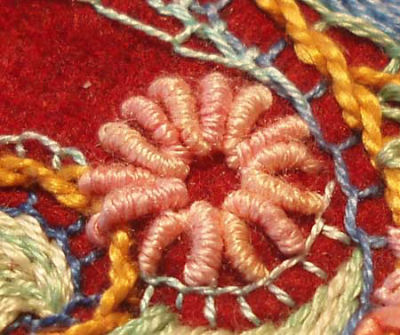
Wonderful bullion knots by Mary Corbet


]


( Resources : Mary Corbet tips, video and techniques )

Tuesday, 22 April 2008

Basic Embroidery Techniques

Basically, there are many techniques applied when doing embroidery or stitches. I don't have any basic for the stitches, but i really want to learn. Yesterday, I google for the technique, and here are some of the stitches and embroidery techniques for beginner that I think it is the best for the first lesson and beginner like me.

Basic Embroidery Techniques
1. Straight Stitch


1. Bring up at A, pull through.
2. Insert down at B, pull through.

2. Japanese Ribbon Stitch

1. Bring up at A, pull through.
2. Lay ribbon flat on fabric and insert needle at B, piercing ribbon and pulling through slowly. Ribbon will curl into B, so don't pull tightly, or effect will be lost. To vary curl, pierce B to right or left of center of ribbon width.

Tip: If ribbon appears straight and narrow, make another stitch on top of first one.

3. Lady Daisy


Use for petals or leaves with ribbon, floss, or perle cotton
1. Bring up at A, pull through.

2. Make loop in direction of other end of stitch and insert at B, a thread or two to side of A. Pull out at C, in direction needle points until loose loop is formed, then stitch back down at D. Note: To prevent ribbon from twisting when it's drawn through fabric after pulling out at C, arrange it around needle so it's flat. Gently hold in place with thumb while sliding needle and ribbon through.

4. French Knots


1. Bring up at A, pull through. Holding ribbon or thread, lay needle on top.

2. Wrap ribbon or thread around needle two to three times. Insert needle at B a thread or two from A. Gently slide wrapped ribbon/thread down needle to rest against fabric, and pull through.

5. Stem Stitch

Use this stitch for flower stems and outlining.

1. Bring up at A, pull through.

2. Insert needle at B on stem line. Holding thread below line, pull out at C directly in line with last stitch (not above or below) and 1/8 in. from B, pull through. Continue to end of line, making sure thread is always held below line of stitching.


( Resources : www.tounton.com )

Other Resources and Links

Add to Technorati Favorites